It took me a loooooong time to get on board the sourdough train. I was really intimidated by feeding schedules, baking schedules, and frankly keeping one other thing alive. I was so fortunate to start off with a really good recipe right off the bat which allowed me to not get discouraged when entering into the realm of sourdough.
One thing that was a major barrier to getting into the dough game was the vague and ambiguous descriptions in each of the major steps. Phrases like ‘when frothy and bubbly’ or ‘when doubled in size’. As a type A instruction-oriented person, this drove me bananas. Once I finally got the hang of things (no thanks to traditional recipe instructions), I have been able to churn out a perfect Rustic loaf week after week. This post is not intended to be a comprehensive step by step recipe, but I did want to share some of the visual cues with photos to help other sourdough newbies (and veterans!) feel a bit more empowered when crafting their loaves with love.
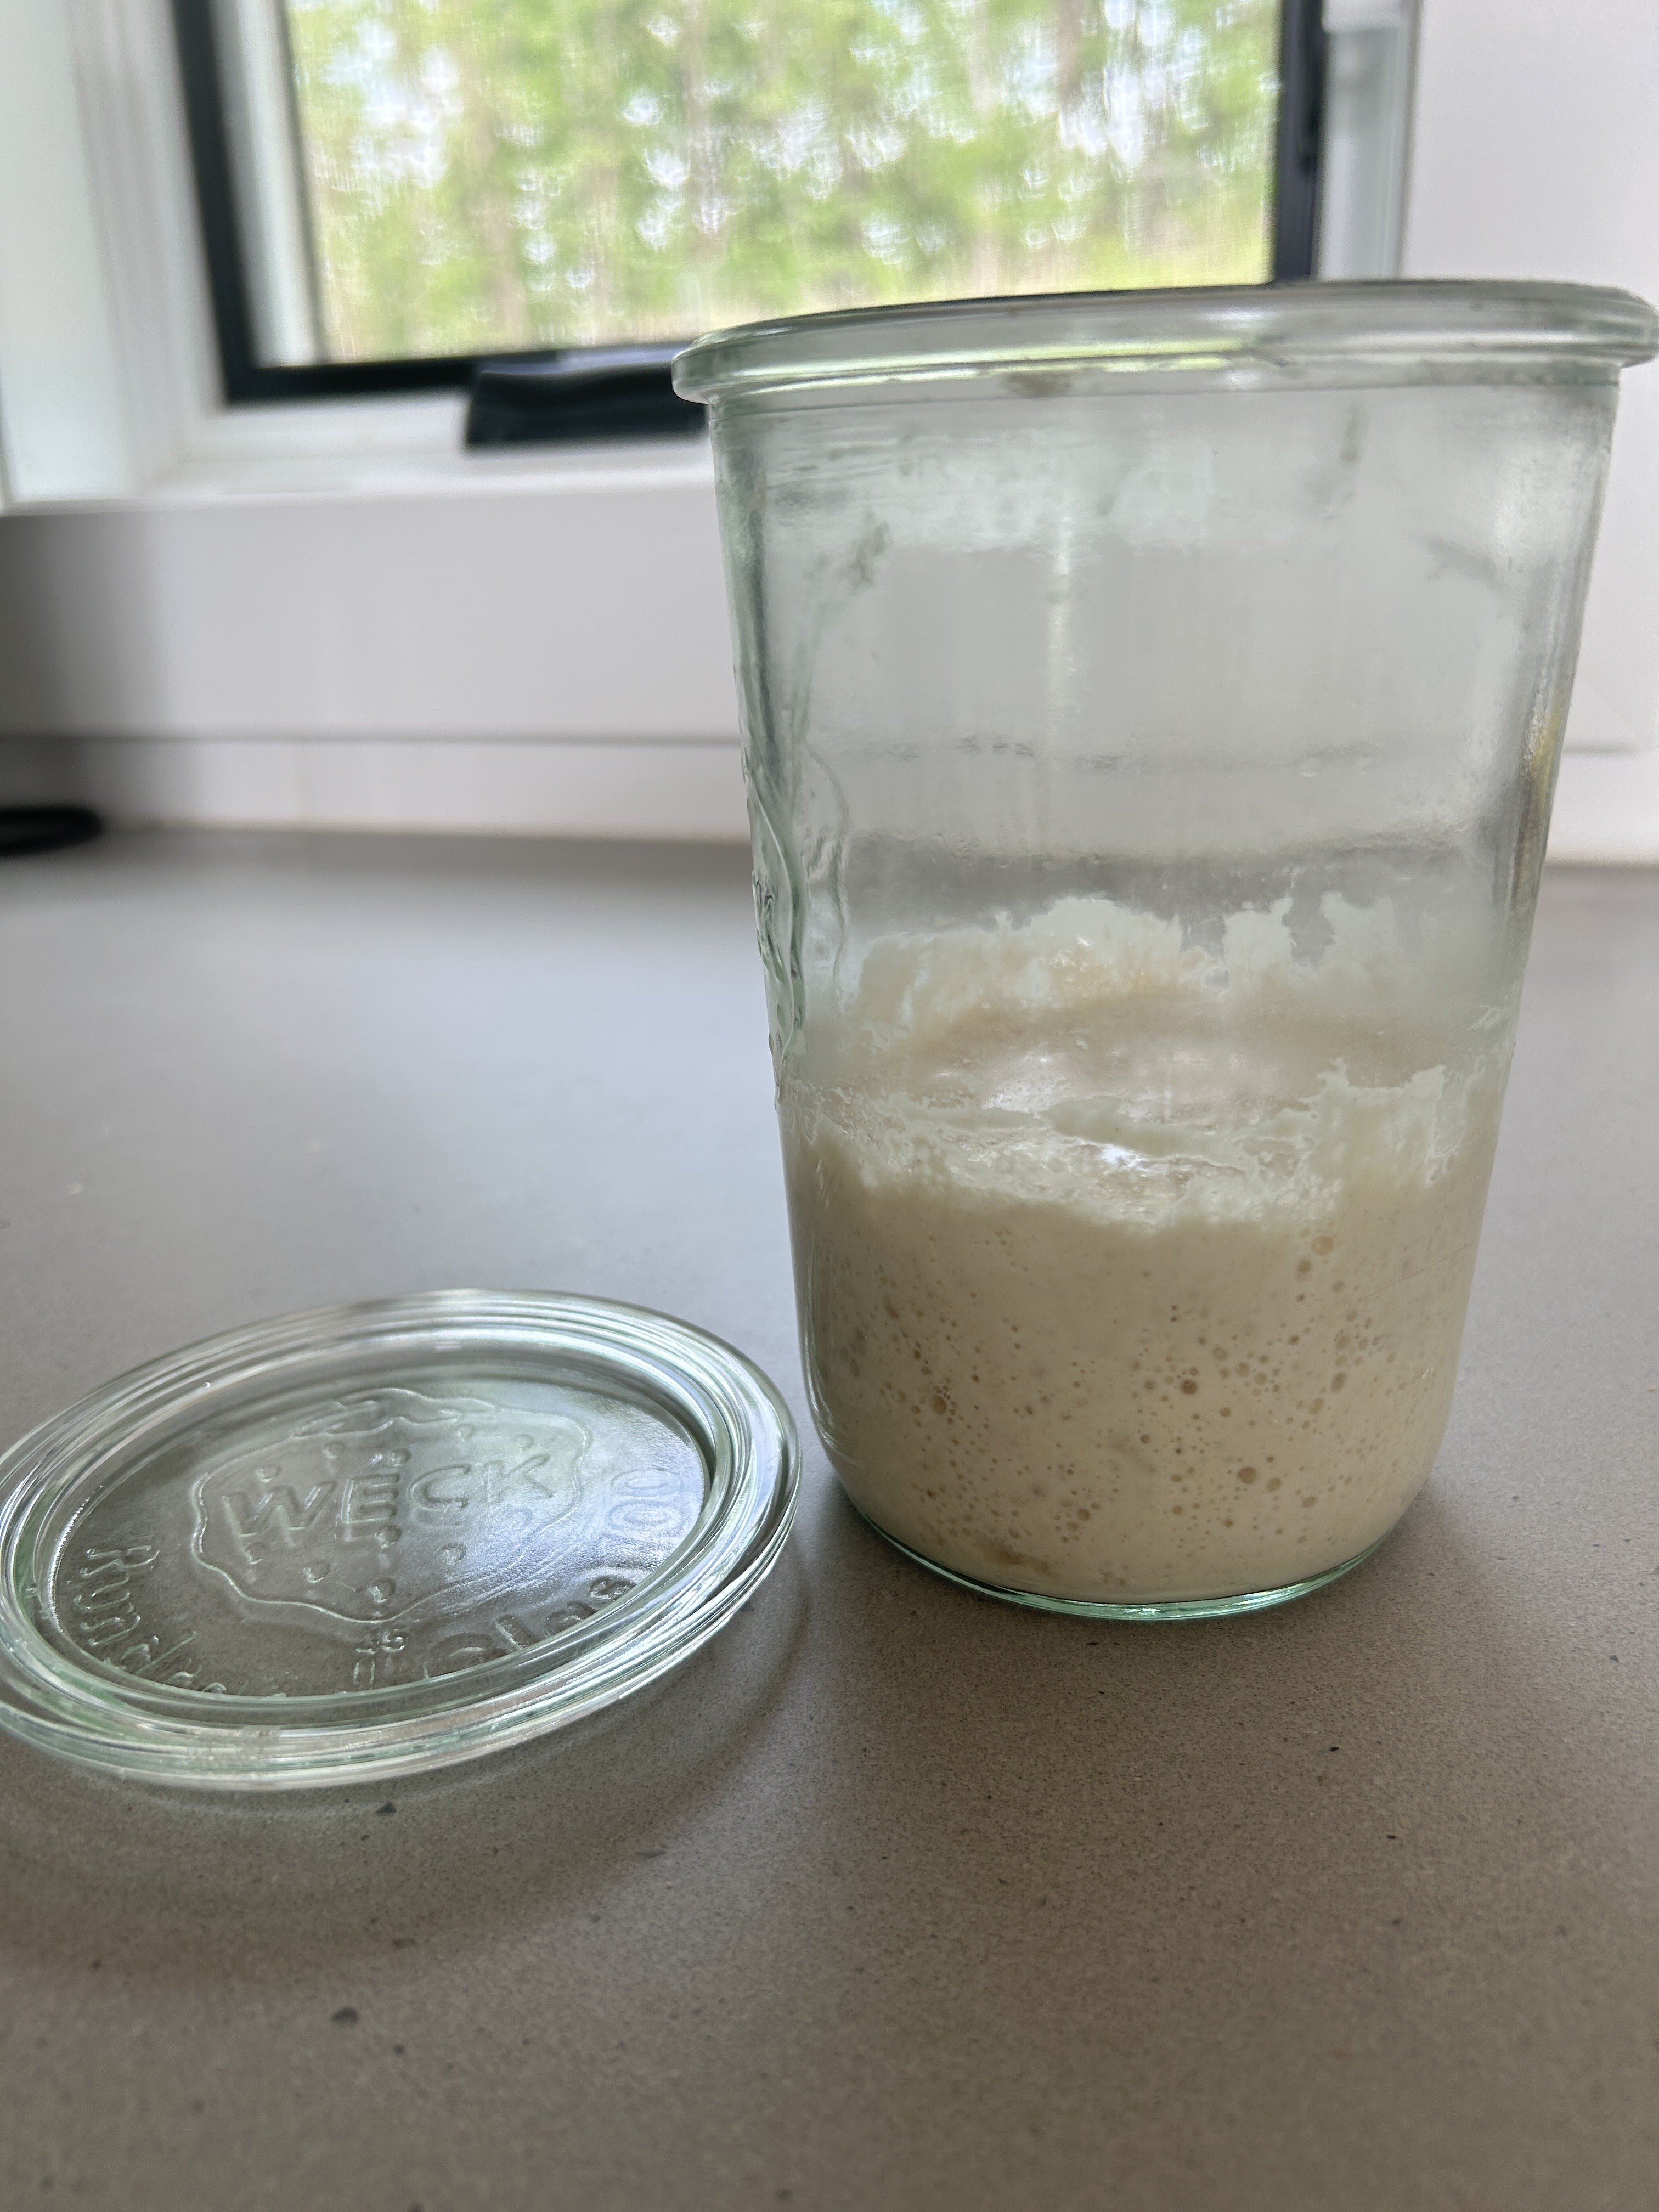
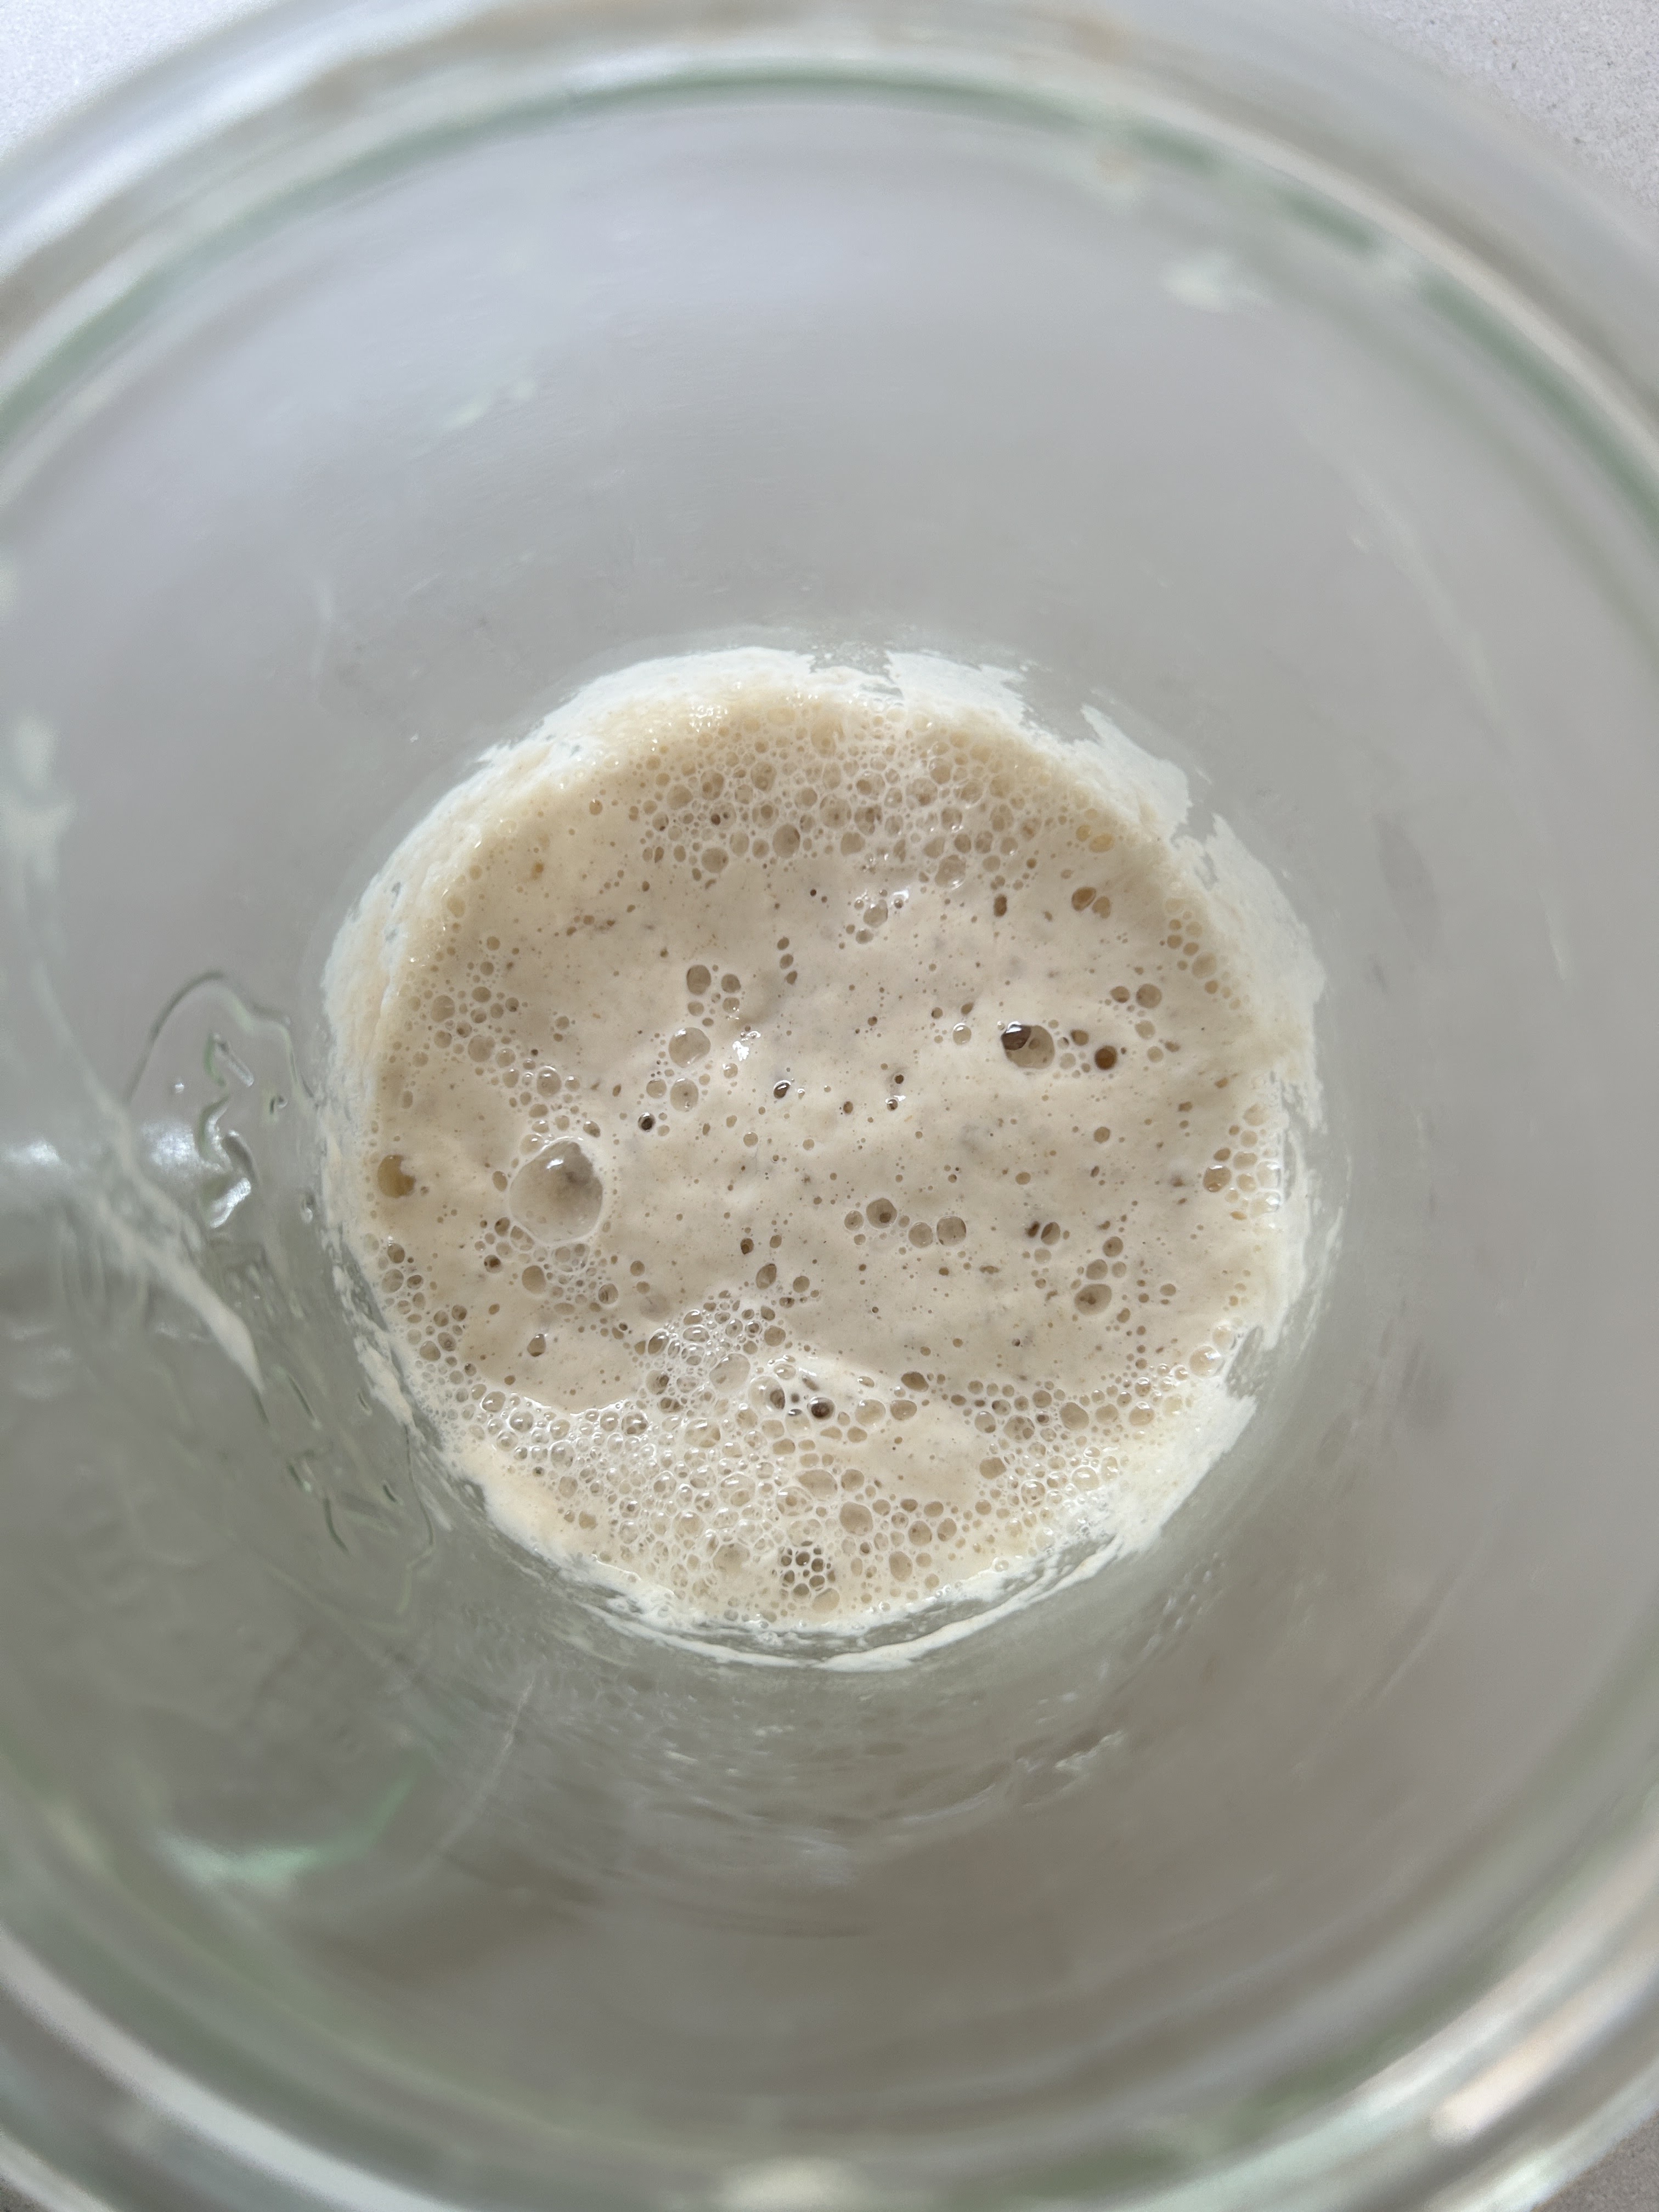
- When is my starter ready? How do I know when it’s ‘bubbly and active’? This one still drives me nuts. I see pictures all over the internet of people with starters that have blown the lids off of their mason jars. I can wholeheartedly say my starter has never grown past the halfway point of my jar. And guess what? I get perfect loaves anyway. I like to compare a starter that is fed and active to marshmallow fluff. You can see the bubbles through the side of the jar, and see some foaming/bubbling on top. Some people mark their starters after feeding to track growth (generally double in size is the rule of thumb), which you can certainly do – but I don’t do this mainly out of laziness, and my starter starts and ends at about the same size every time so I’m good at eye-balling it. The picture below represents about a doubling in size from when I fed it.
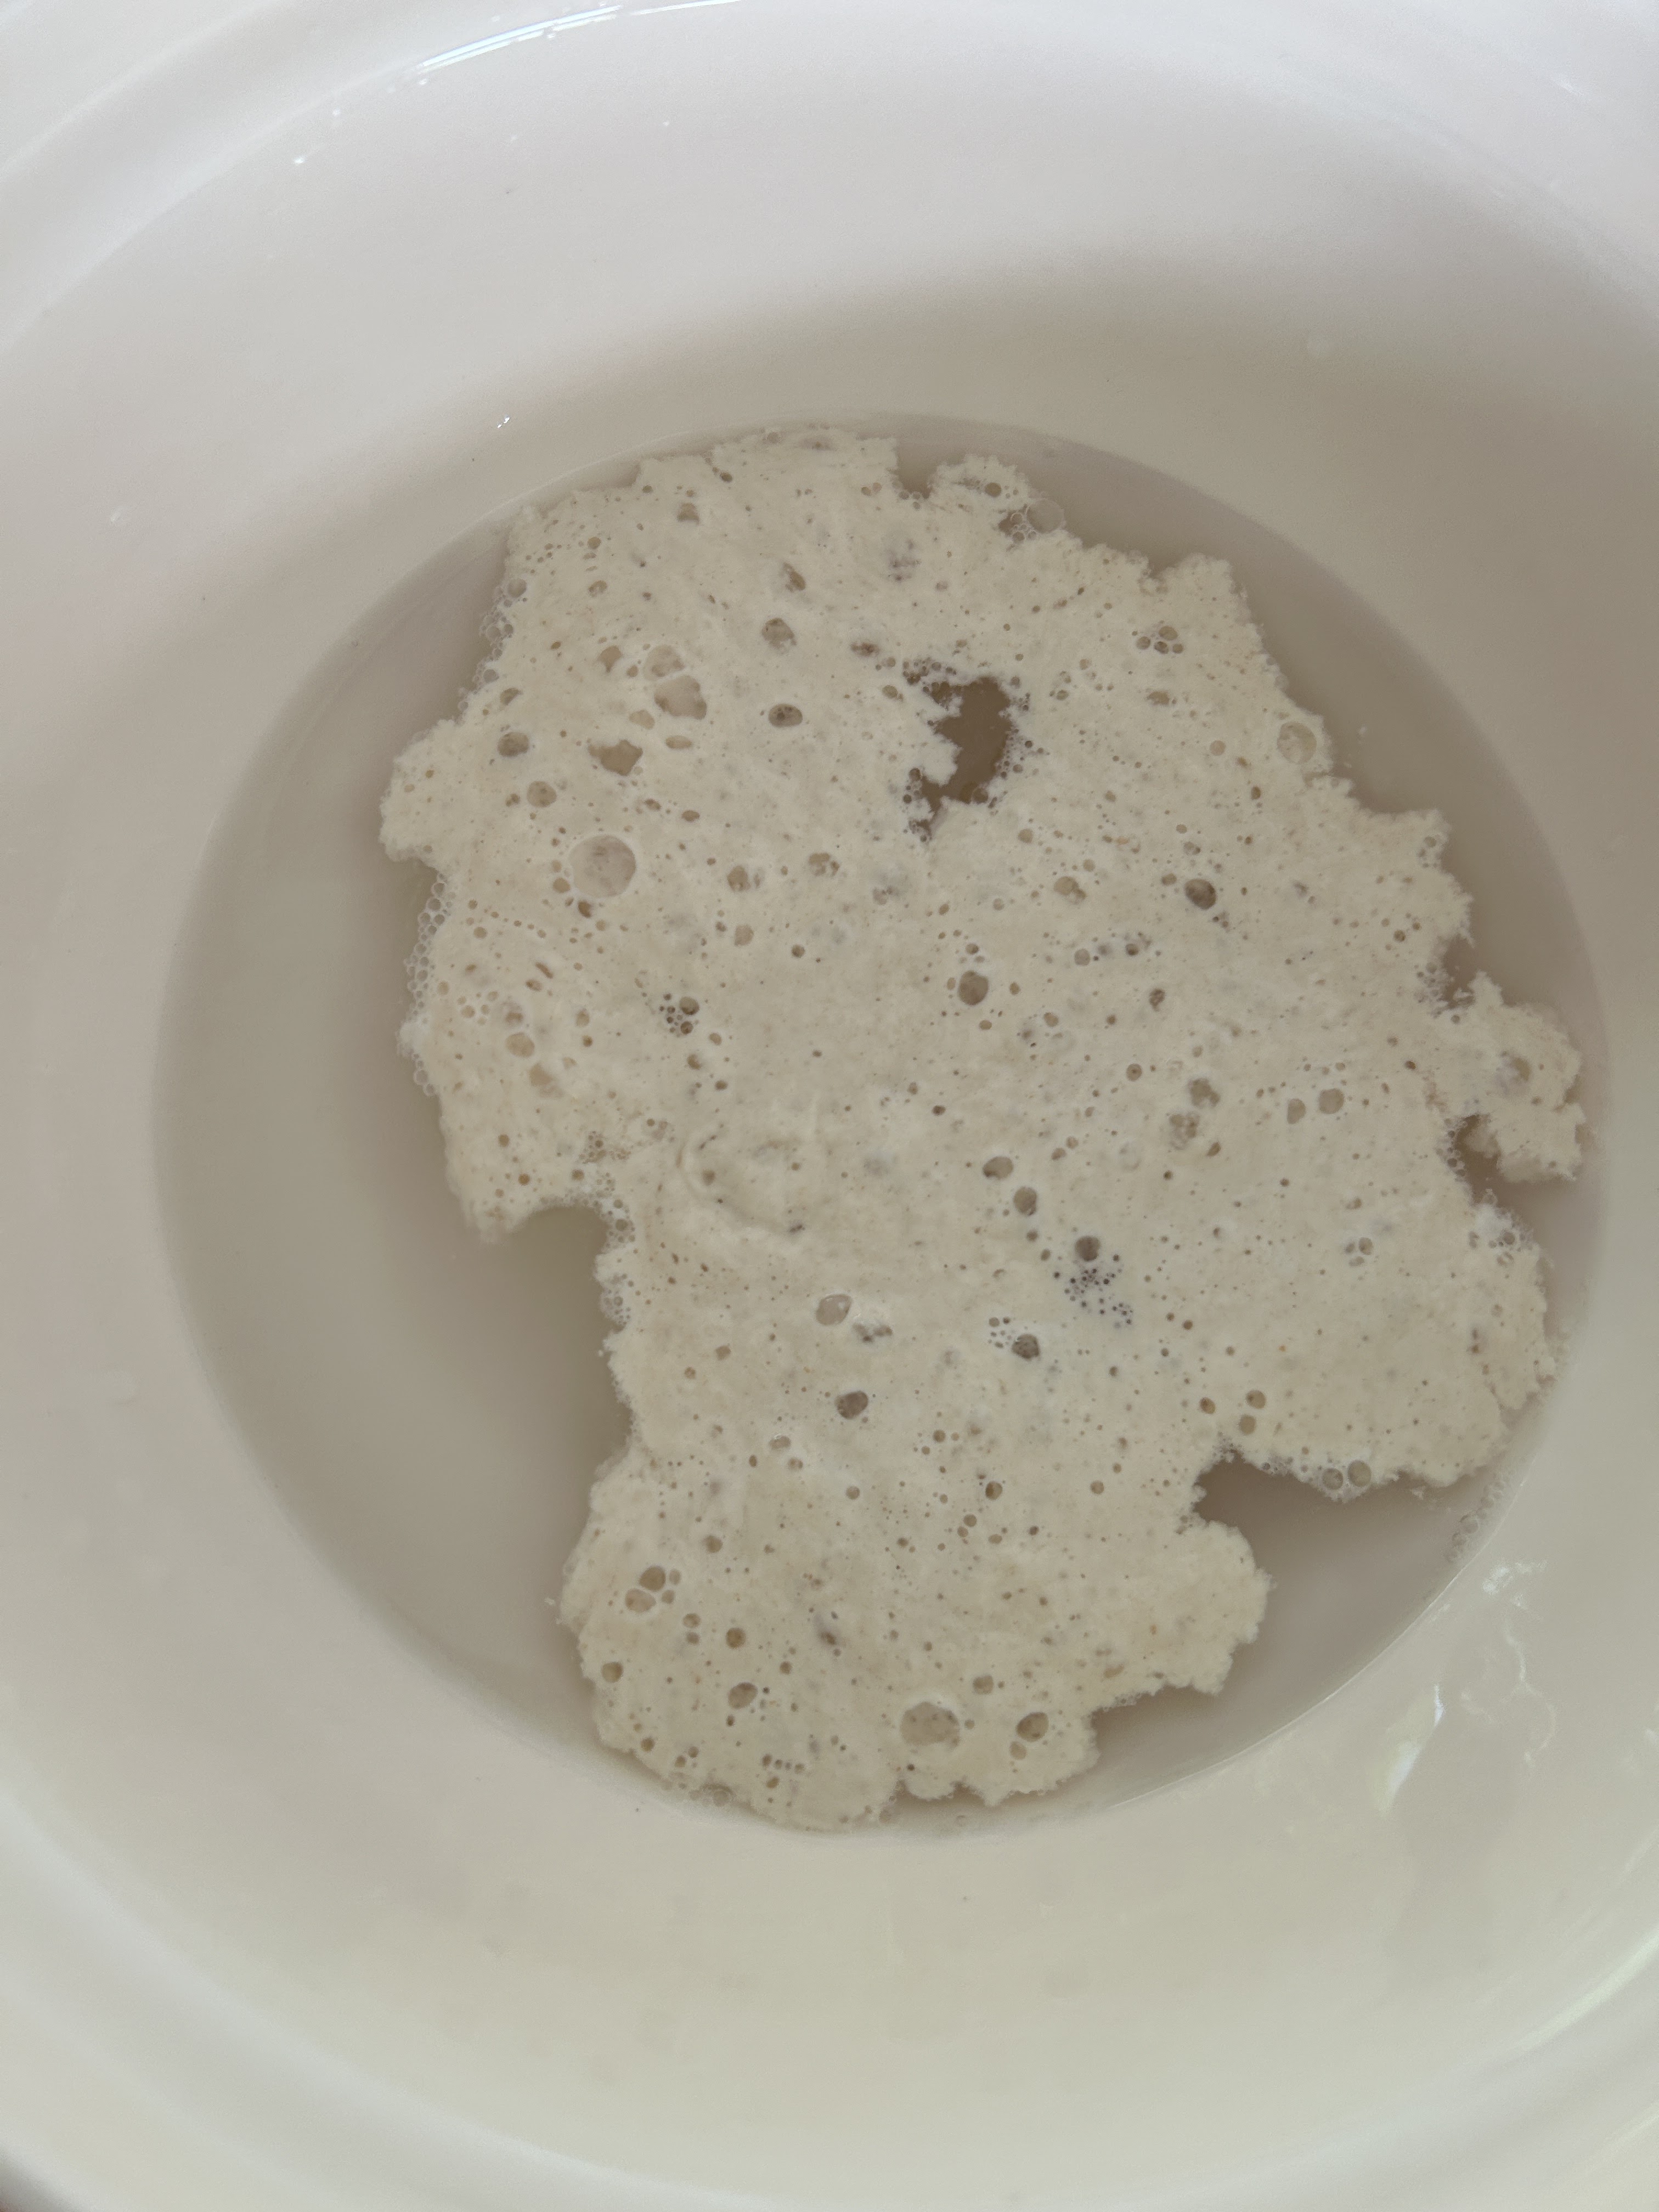
2. The ‘float test’. This one is a bit more intuitive, but your starter should float on top of the water that you will mix it with when you start your dough:
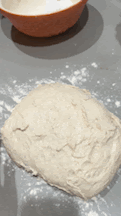
3. Does this look right? The question I ask every time I first combine my dough ingredients. It should look shabby and a bit disheveled. Don’t worry, it will all come together with time and stretch/folds.

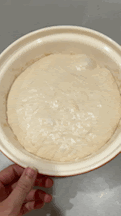
4. After last stretch/folds, during bulk ferment. Your dough will look a bit more formed and smooth after having done your stretch and folds. It will likely spread to fill the bowl like this:
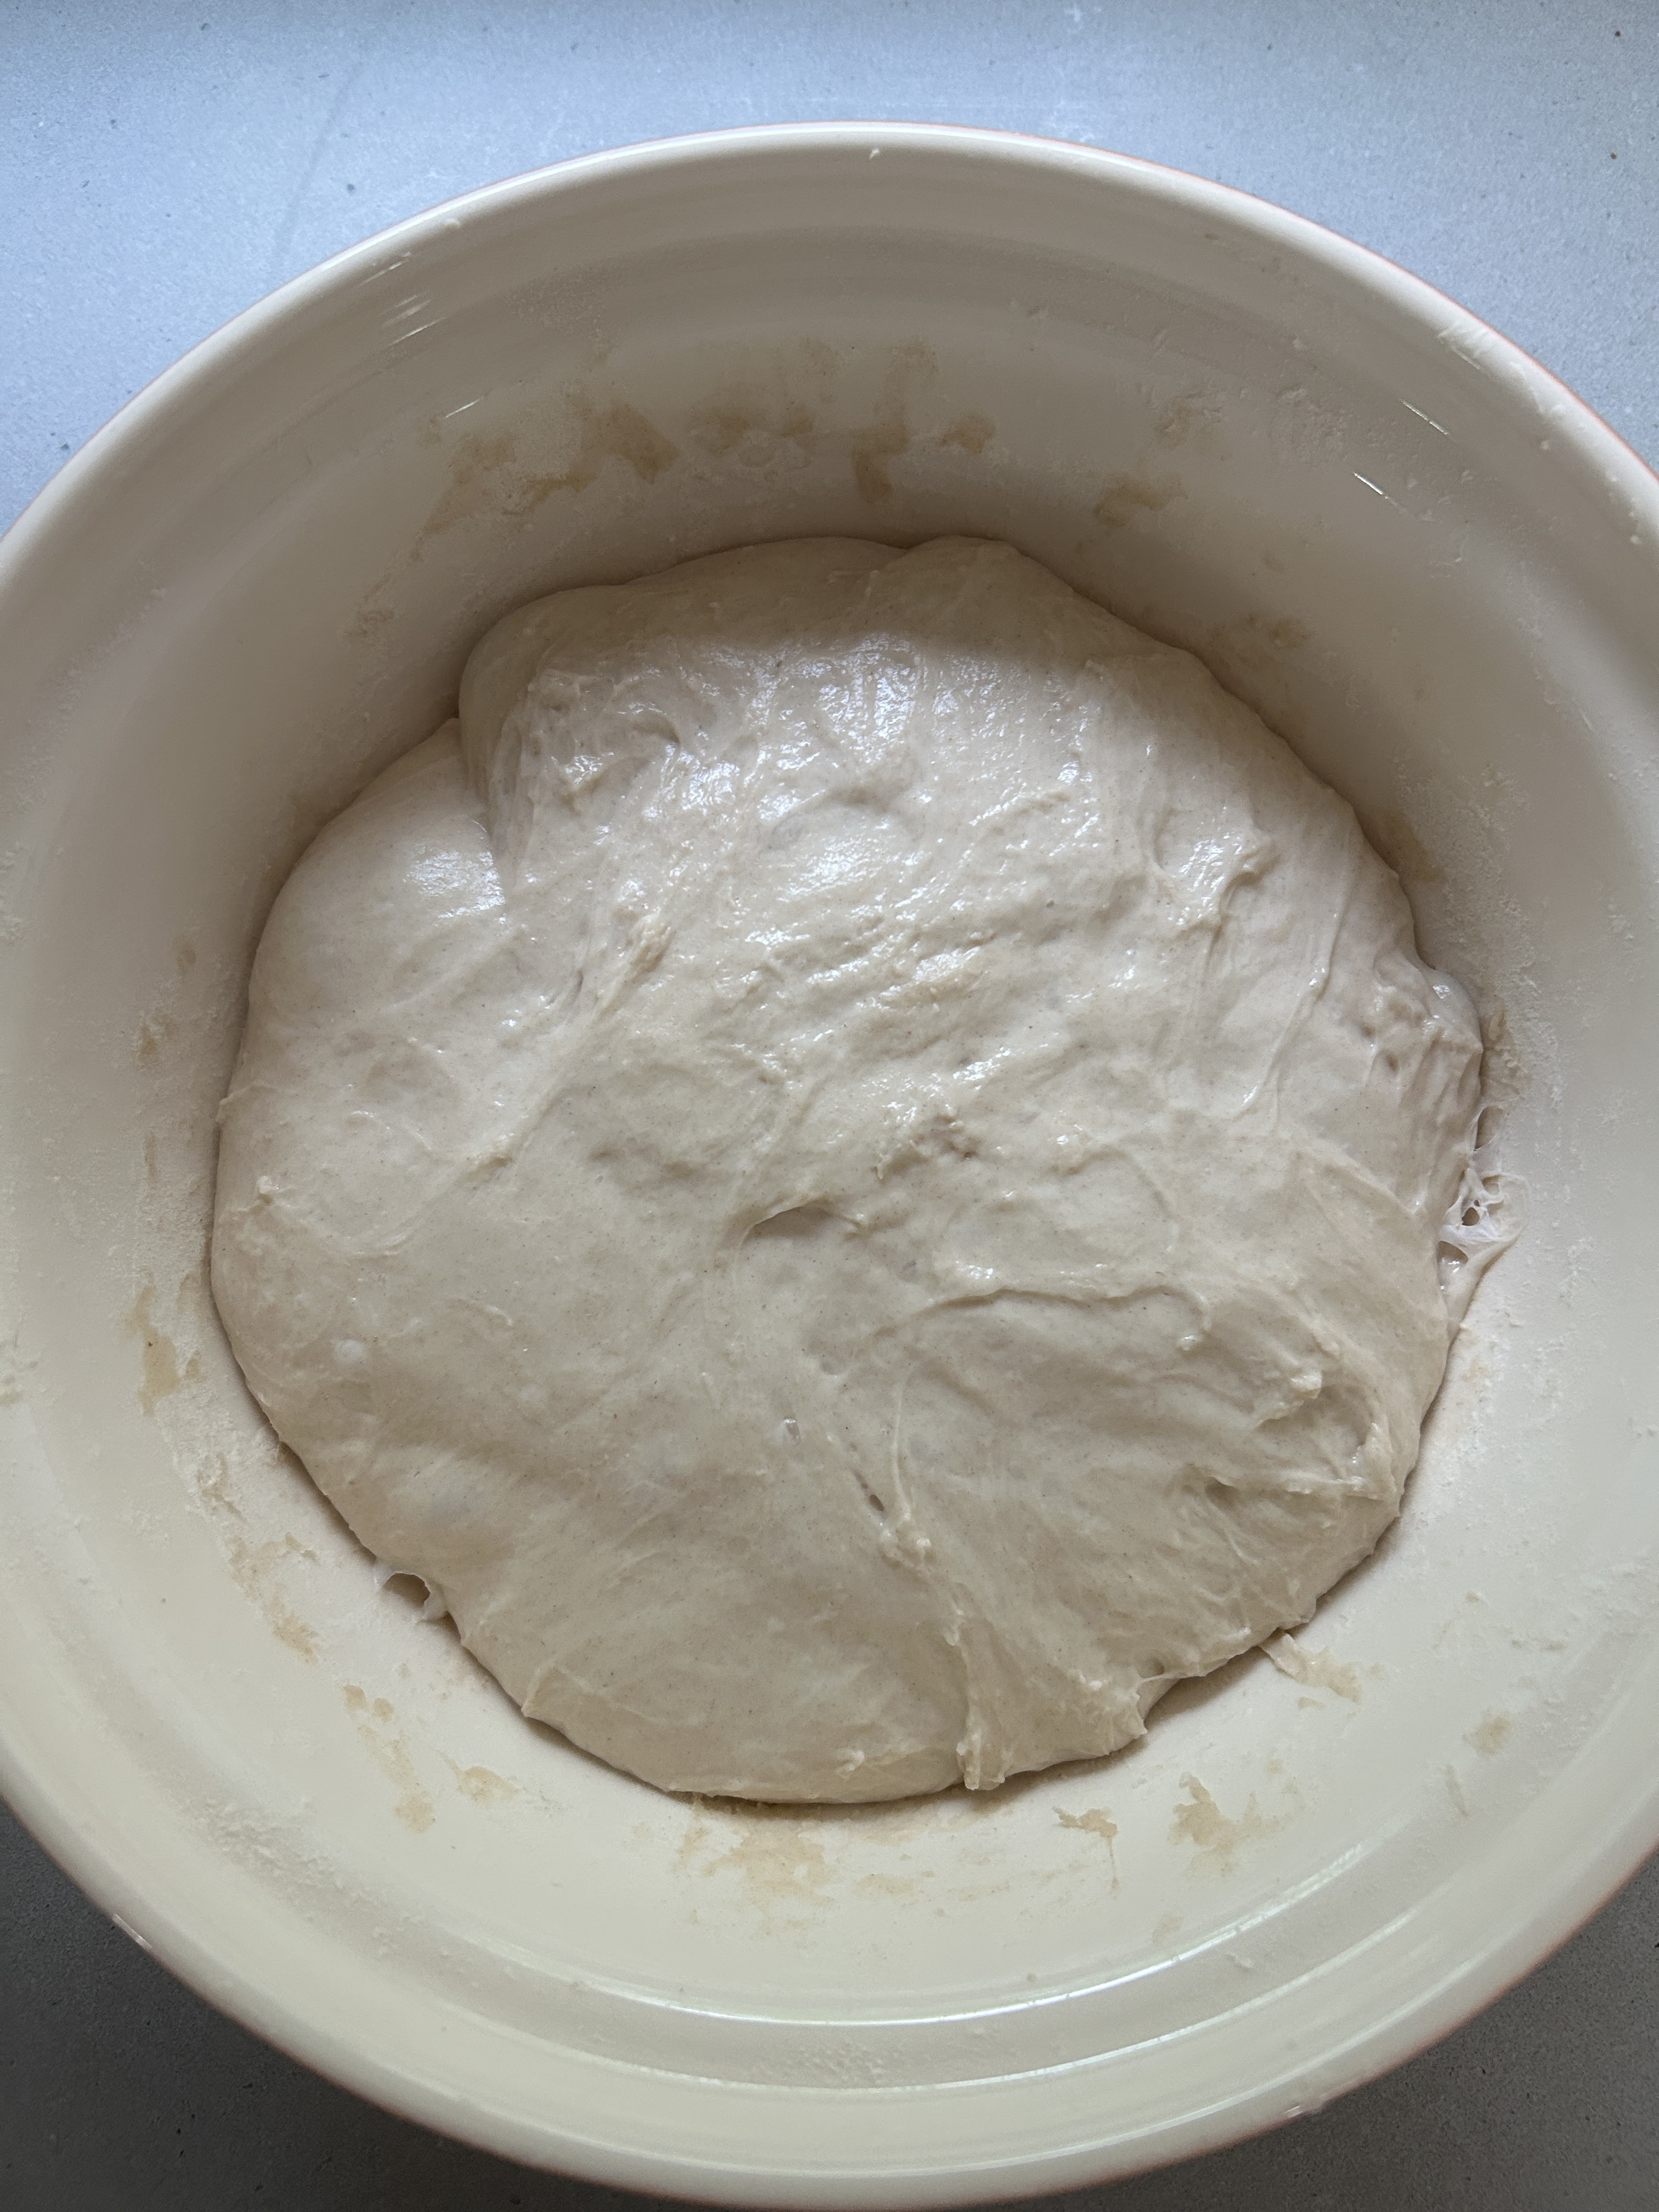
5. End of bulk ferment. When your dough has ‘doubled in size’ – before shaping and putting in the fridge for cold ferment. Dough should have a little bit of wiggle to it. This is the major indicator that it’s ready and will form a good crumb when baked. I have baked dough that was under proofed and it was like a brick. The ‘wiggle’ was the telltale sign that it proofed on the counter adequately:
6. When you dump it on the counter it should be soft and jiggly, easy to work with like a fluffy pillow:
Just shape the dough how you prefer, put it in your proofing bowl of choice and throw that baby in the fridge!
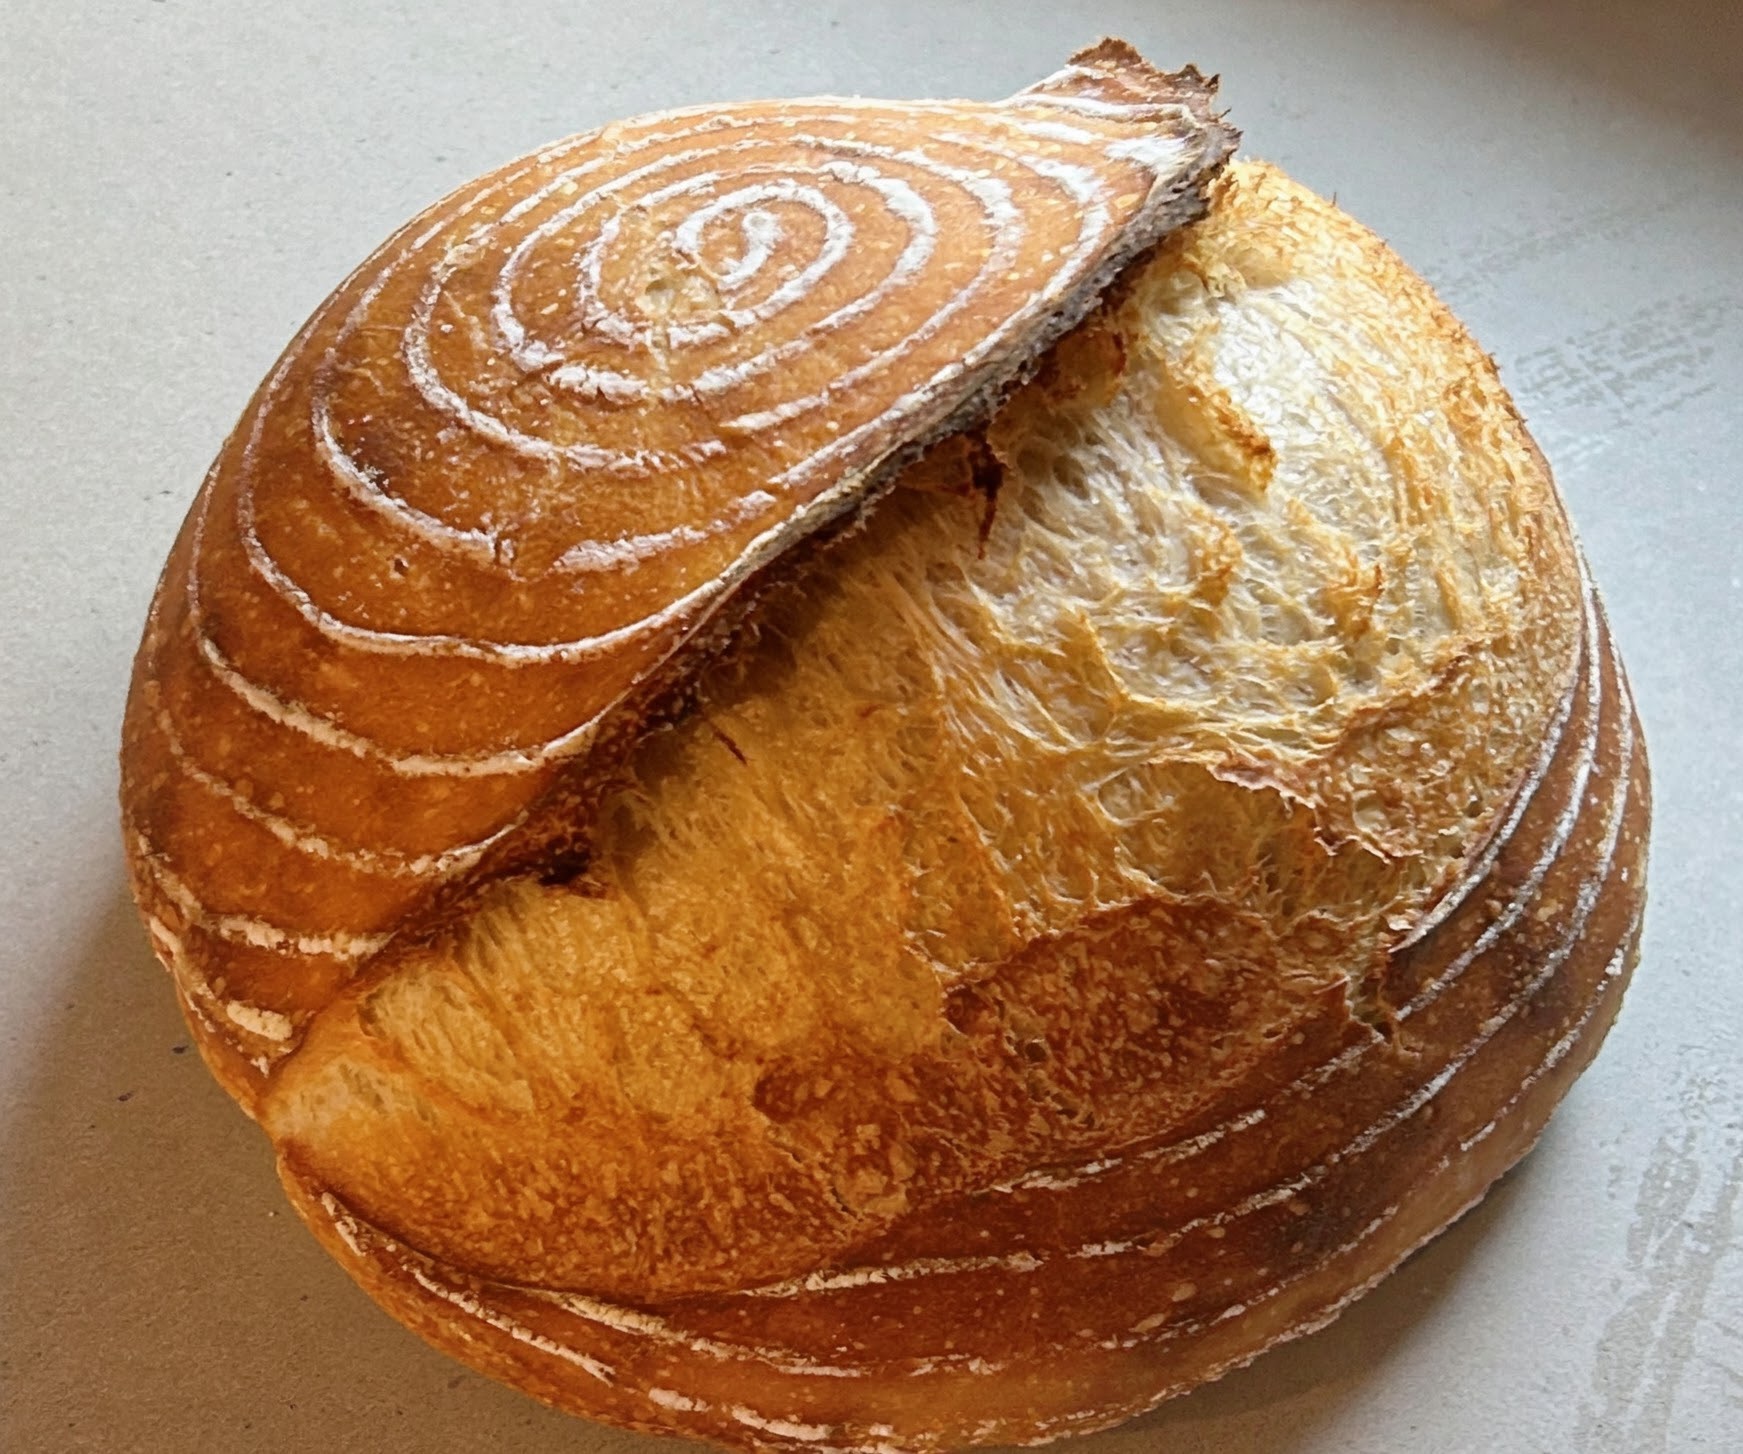
Bonus tip (not a visual cue): I find that even if my loaf looks pretty flat coming out of the fridge (as this one did) – if you preheat your Dutch oven in the oven at 500 degrees Fahrenheit for 30 minutes, then pop the cold dough (scored) in the Dutch oven lined with parchment and put it right in the oven, it gives a GREAT oven spring and results in a peaked, poofy, gorgeous loaf!
I hope this visual guide has been helpful and encouraging as you start your journey. Remember, it often looks imperfect – but the process is much more forgiving than you think! Please share your experience and best kept tips below!
-NLM

Leave a comment